Entra Private Access: Secure Internal Resources with Conditional Access

In this article, will walk you through the capabilities of Microsoft Entra Private Access to enable and secure access to internal resources through Global Secure Access client and Conditional Access.
Microsoft Entra Private Access provides a quick and easy way to replace VPN to securely access internal resources using the secure capabilities of Conditional Access. Entra Private Access is a part of Microsoft Global Secure Access which is based on SASE (Secure Access Service Edge) framework with a combination of WAN functions and ZTNA (Zero-Trust Network Access) in a cloud-based platform.
Entra Private Access provides two ways to configure the internal resources that tunnel through the service:
Quick Access App: Quick Access is the primary group of internal resources that you always want to secure and tunnel through the service.
Global Secure Access App: A Global Secure Access app (per-app access) could be configured for a subset of internal resources, private resources with different set of Conditional Access policies, and etc.,
Prerequisites
Required Roles
- Global Secure Access Administrator role: Required to setup and manage Entra Private Access
- Application Administrator role: Required to create Quick Access and Global Secure Access Apps and register connectors
- Conditional Access Administrator or Security Administrator role: Required to create and interact with Conditional Access policies
Supported Devices
- Windows 10/11 (Microsoft Entra Joined)
- Android
- MacOS (Early Access - Private Preview)
- iOS (Early Access - Private Preview)
Enable Entra Private Access
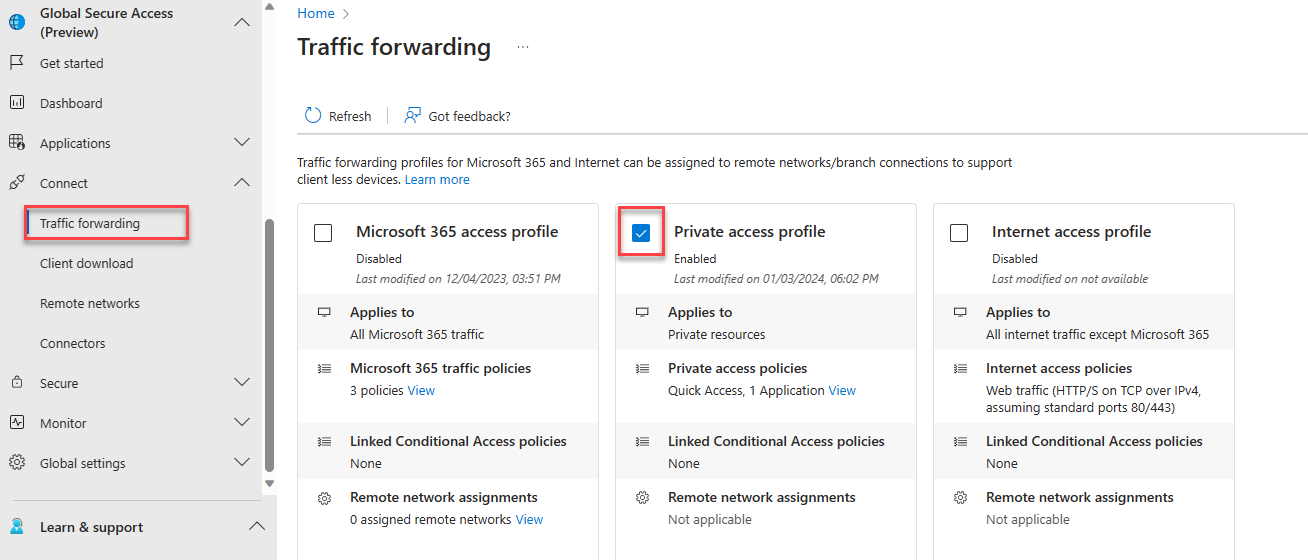
Login to entra.microsoft.com, Navigate to Global Secure Access -> Connect -> Traffic forwarding then enable Private access profile.
Download and Install Connector
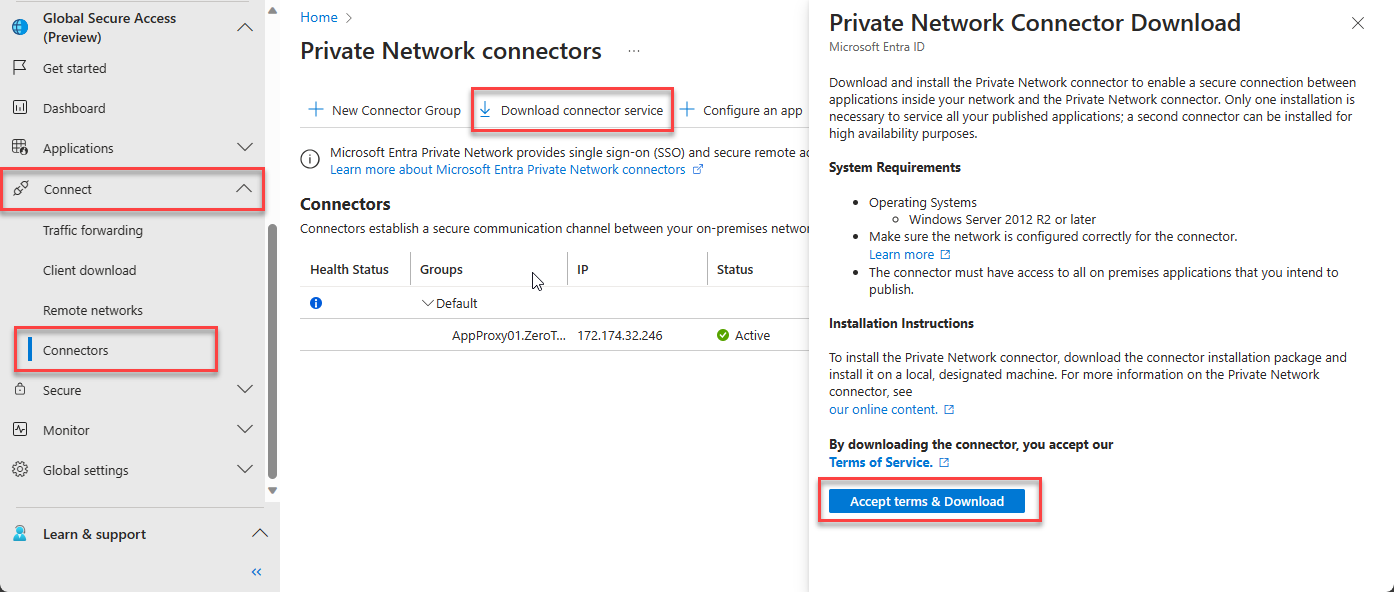
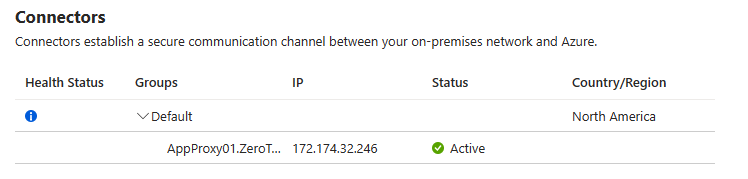
Download the connector service from Global Secure Access -> Connect -> Connectors. Click on Download connector service -> Accept terms & Download.
Install the downloaded connector on a Windows Server 2016 or higher. Once connector is successfully installed and registered with Entra tenant, Connector Service details will be visible under Connectors page.
Download and Install Global Secure Access Client
Download the client from Global Secure Access -> Connect -> Client download page.
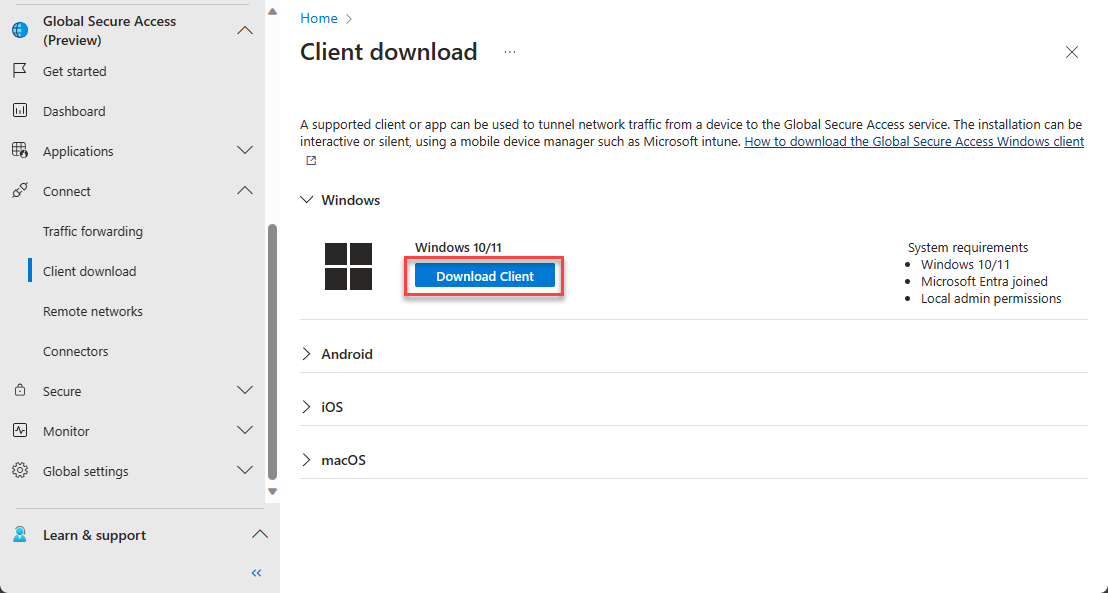
Install GSA client on a Entra joined Windows 10/11 device. Once installed, verify the service is running by opening the Advanced diagnostics and see the Overview and Health check.

Create Quick Access Configuration
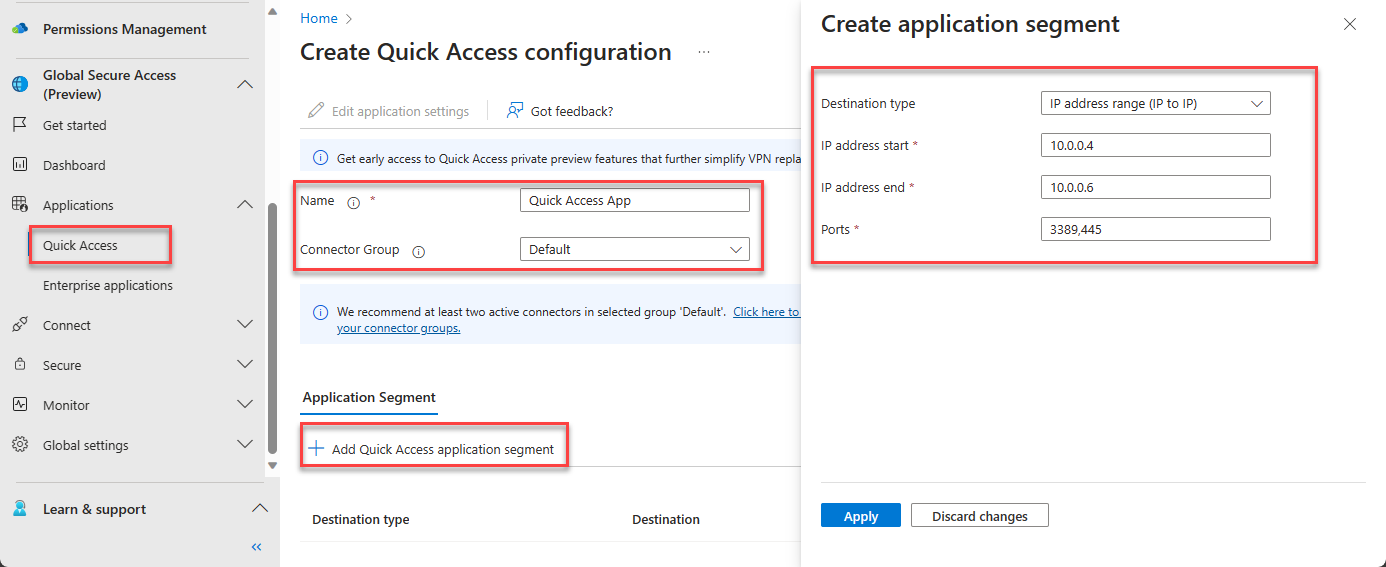
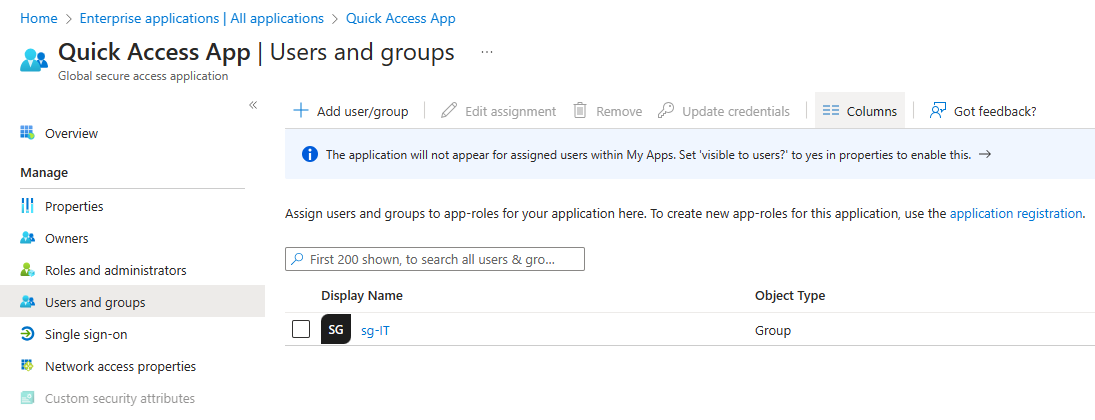
To configure Quick Access app: Navigate to Global Secure Access -> Applications -> Quick Access.
- Enter Name (example: Quick Access App)
- Select Connect Group
- Click on Add Quick Access application segment
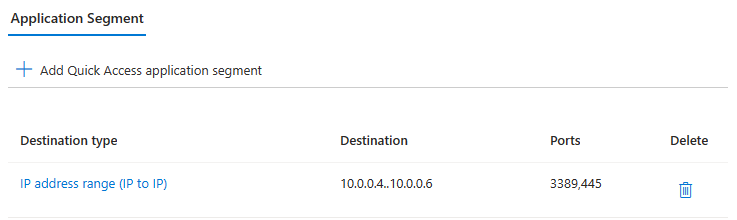
- Create application segment. In this example, IP address range is selected
- In case of multiple protocols, port numbers can be seperated by comma(,)
- Click on Apply
Click on Save
Once Quick Access App is configured, make sure to assign the application to users or groups.
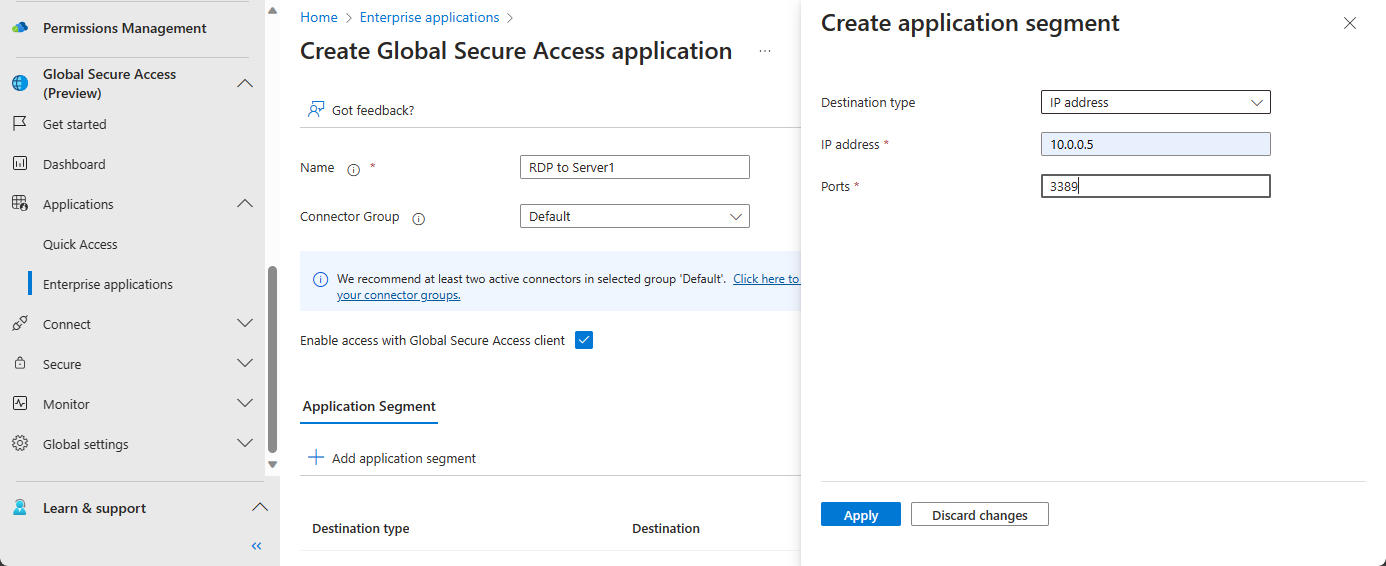
Create Global Secure Access Application
To configure Quick Access app: Navigate to Global Secure Access -> Applications -> Enterprise applications -> New Application
- Enter Name (example: RDP to Server1)
- Select Connect Group
- Check Enable access with Global Secure Access client
- Click on Add application segment
- Create application segment. In this example, IP address range is selected
- In case of multiple protocols, port numbers can be seperated by comma(,)
- Click on Apply
- Click on Save
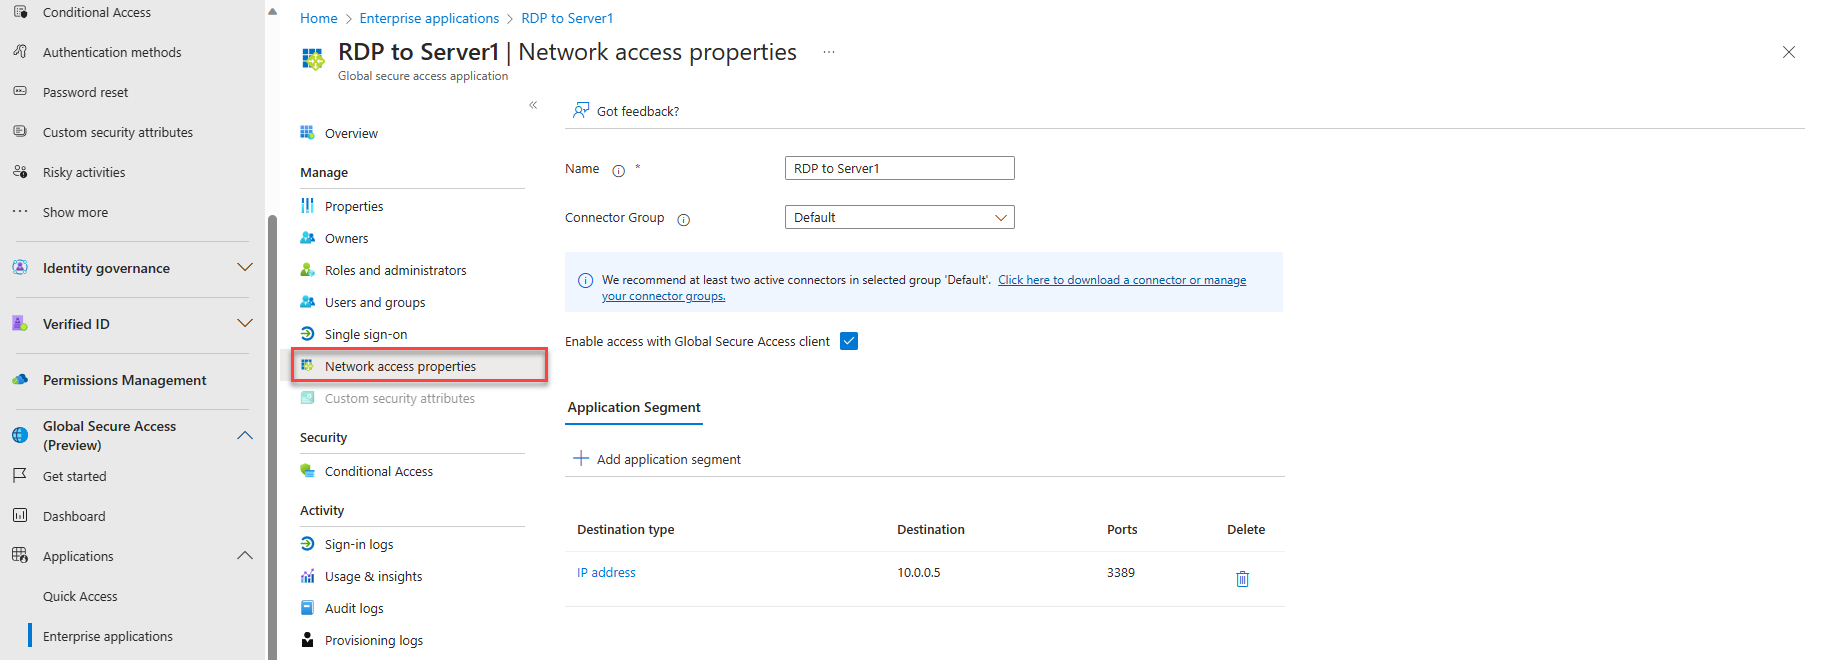
In case of additional app segments to be added. Open the application (for example RDP to Server1) -> Network Access Properties, then add new application segment.
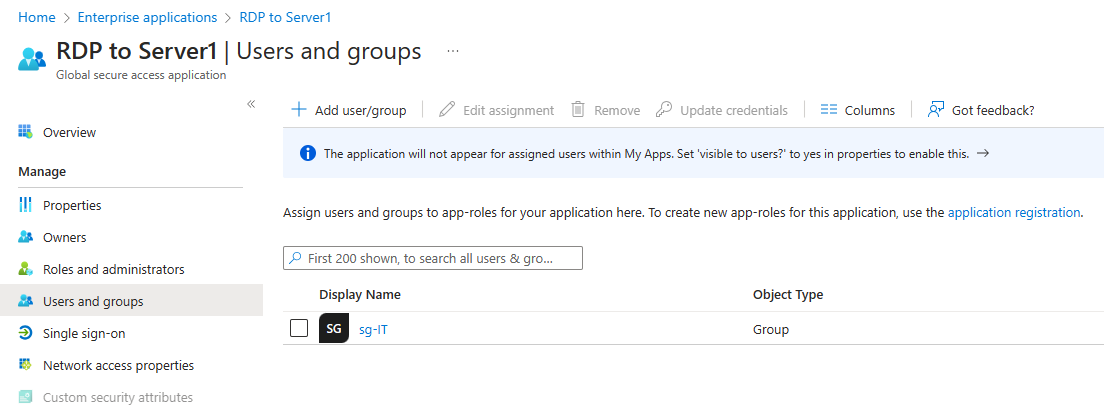
Once Global Secure Access App is configured, make sure to assign the application to users or groups.
Create and Assign Conditional Access Policy
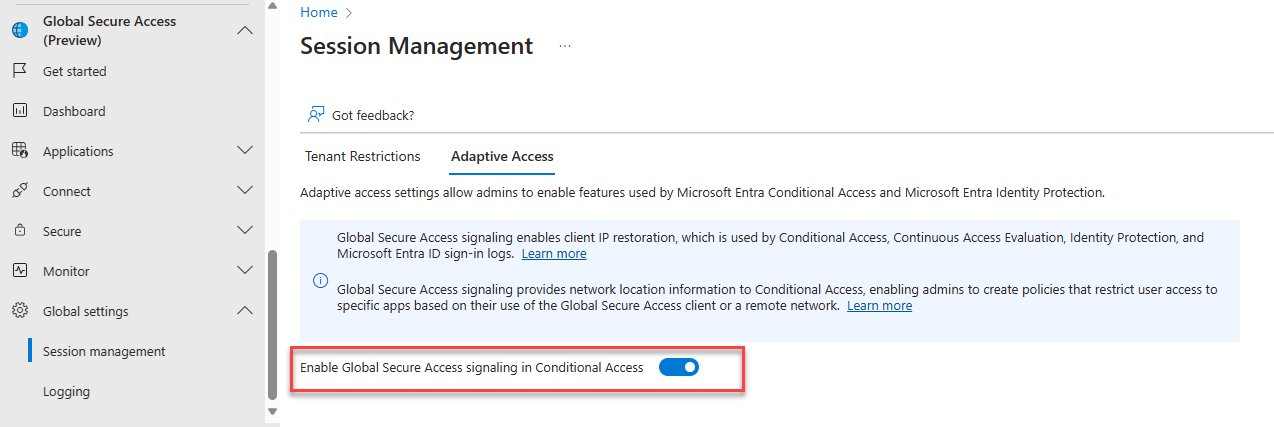
Before you assign a Conditional Access policy, make sure Adaptive Access is enabled.
Navigate to Global Secure Access -> Global Settings -> Session management -> Adaptive Access. Enable Global Secure Access signaling in Conditional Access.
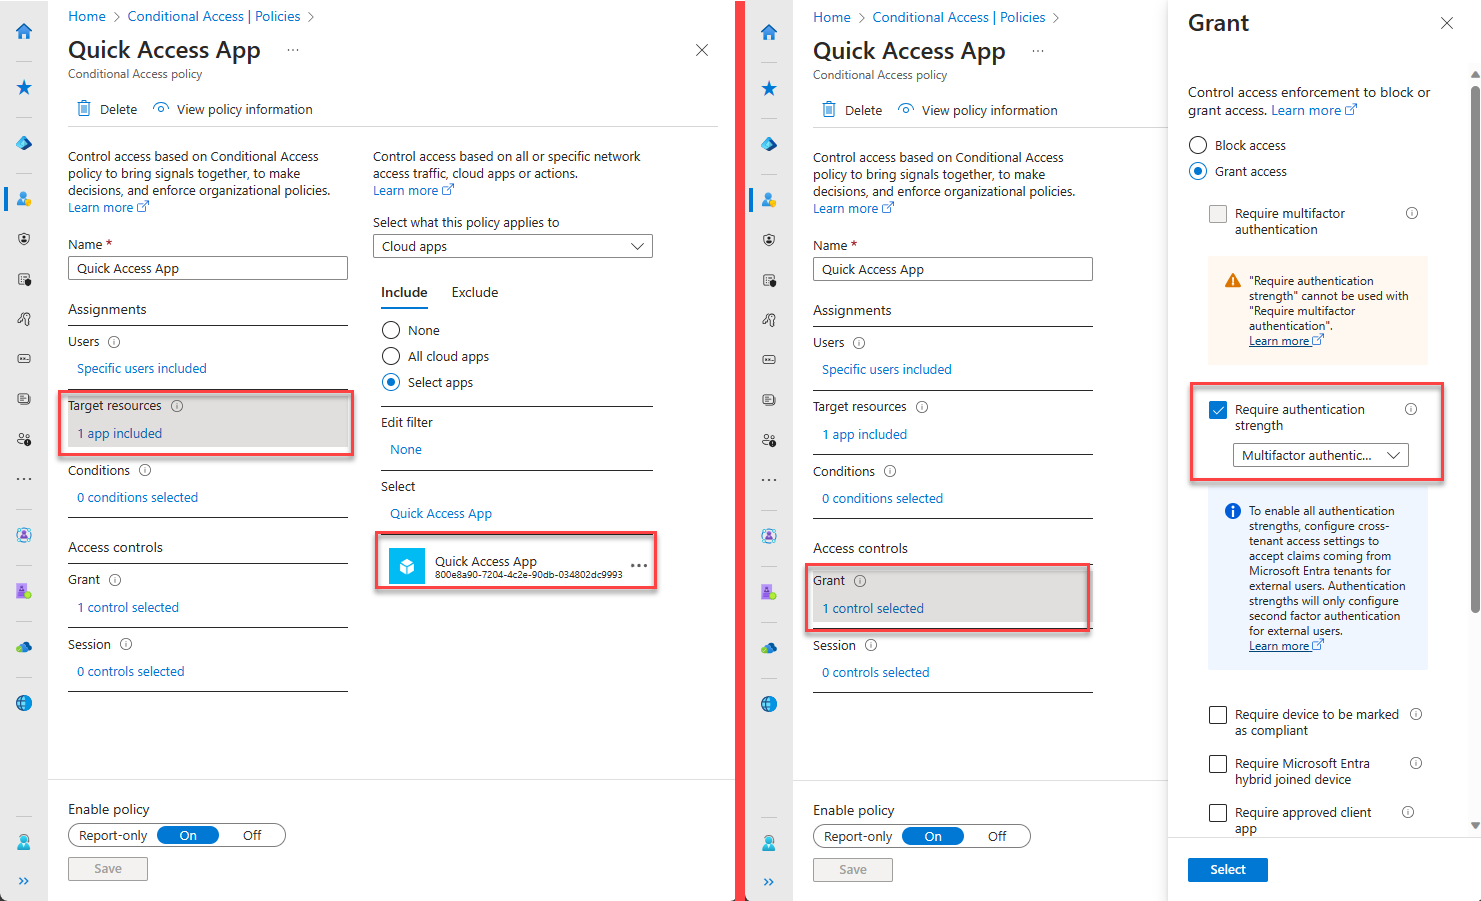
Navigate to Protection -> Conditional Access -> Create new policy.
- Select users and groups to assign the policy
- Select target resources as Cloud apps -> Select apps -> Quick Access or Global Secure Access Apps
- In Access controls, Grant access and select controls as needed
- Enable policy and Create
Verify Private Access Rules
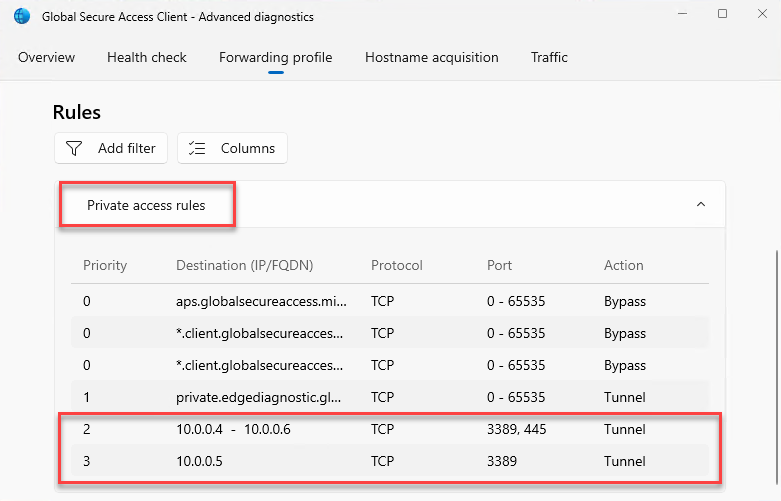
Login to the Microsoft Entra joined device where Global Secure Access client is installed.
Open Global Secure Access Client - Advanced diagnostics. Click on Forwarding profile and verify the app segment rules are available under private access rules. (It might take up to 5 mins for the new rules to be applied on the client machine)
Demo
Verify Logs
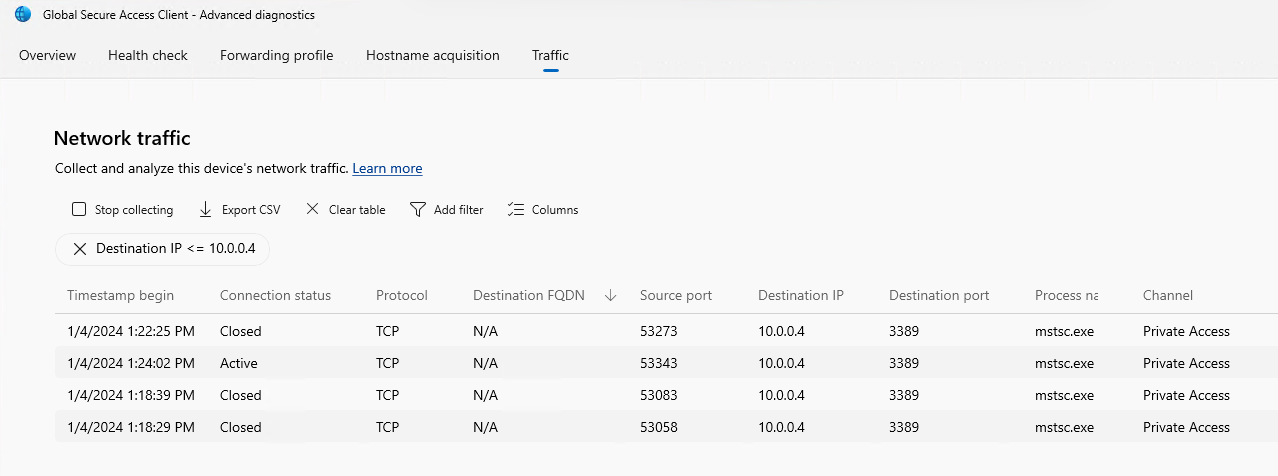
Global Secure Access Client - Advanced Diagnostics
Open Global Secure Access Client - Advanced Diagnostics -> Traffic. Click on Start Collecting.
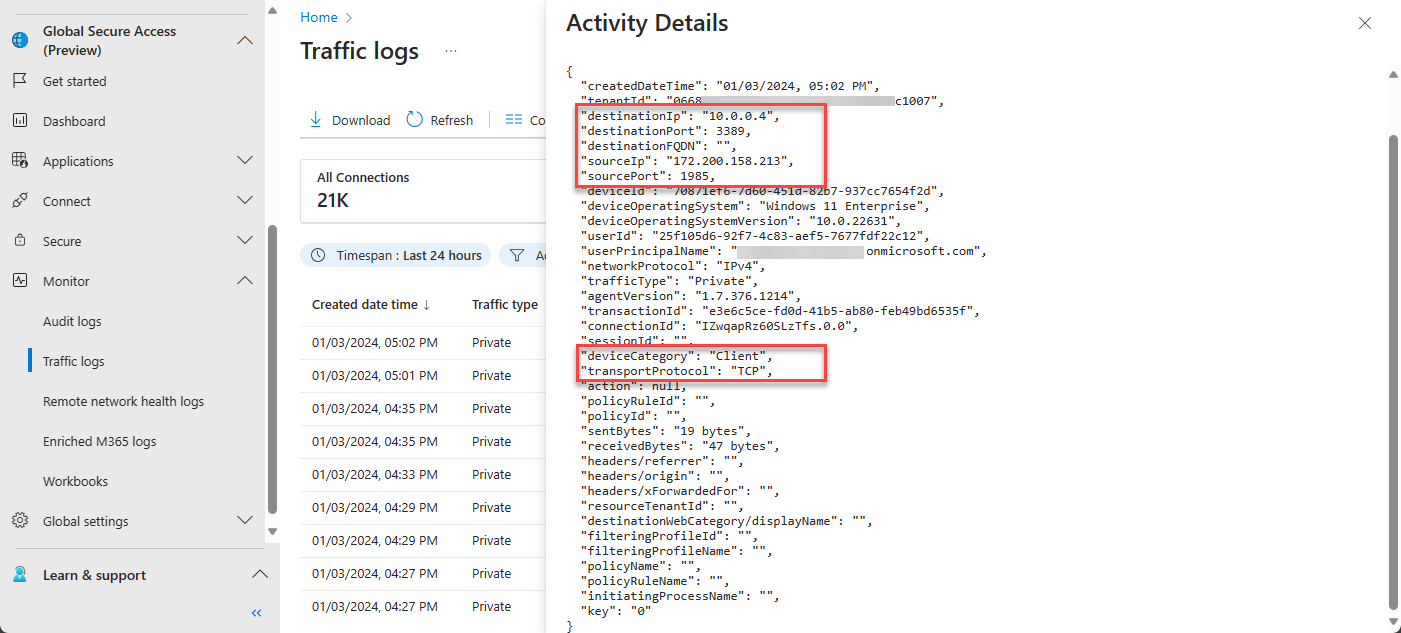
Entra Admin Center Traffic Logs
Navigate to Global Secure Access -> Monitor -> Traffic logs. Select Private Access Connections
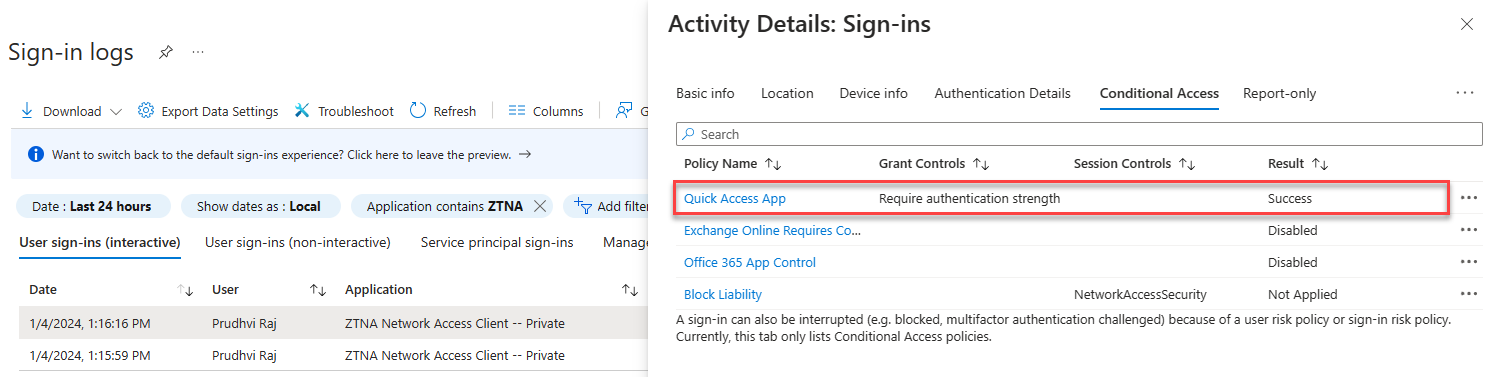
Conditional Access Sign-in Logs
Navigate to Protection -> Conditional Access -> Sign-in logs.

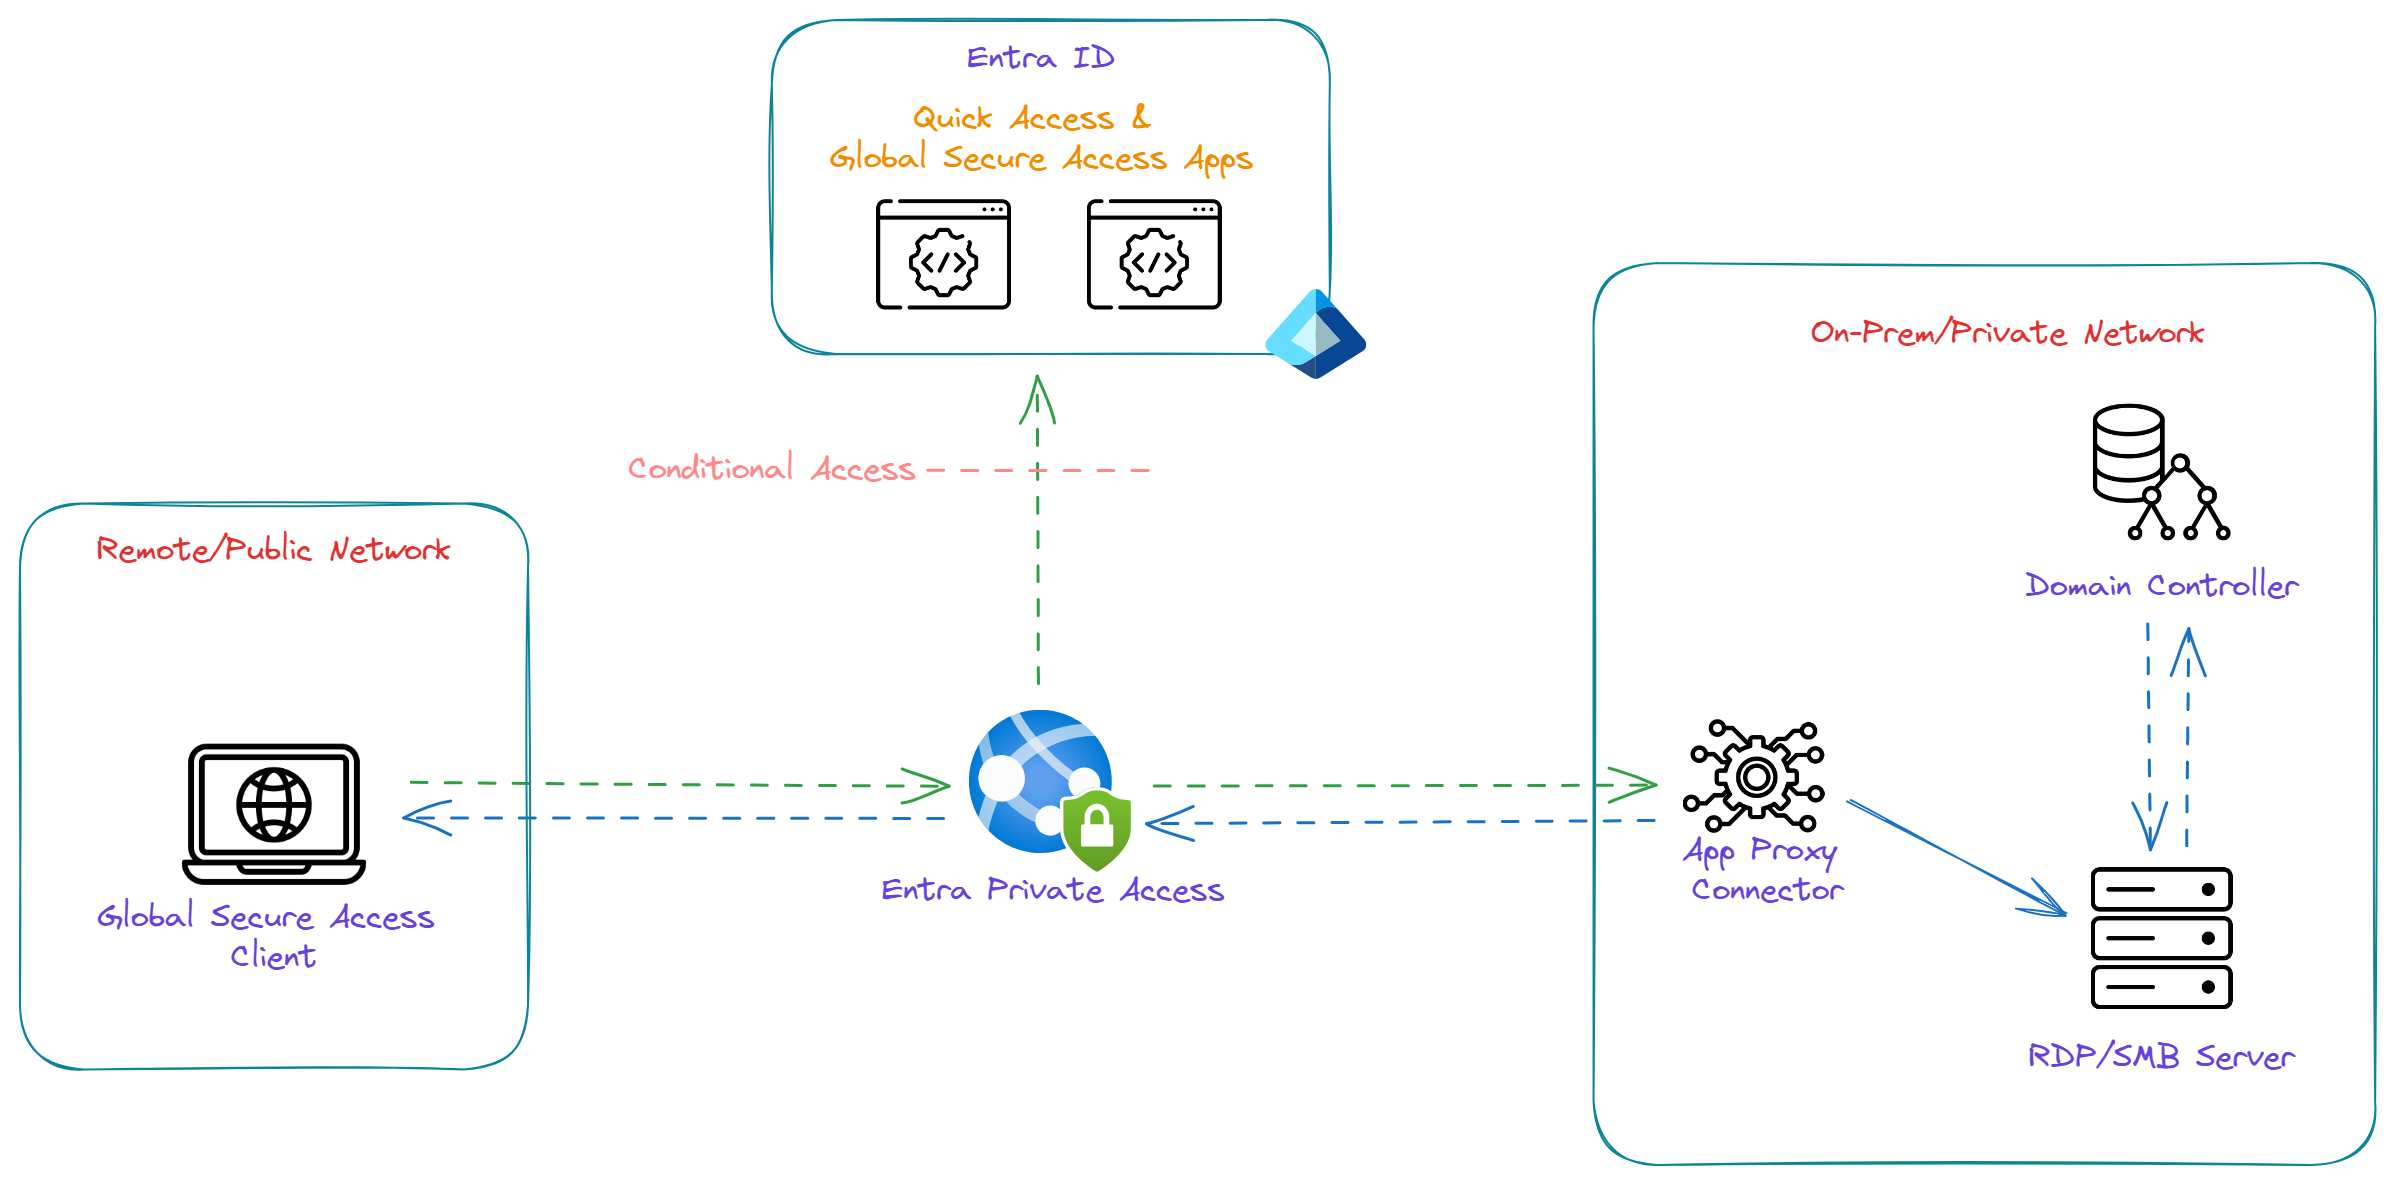
Scenario: When Global Secure Access Client is on On-Prem/Private Network
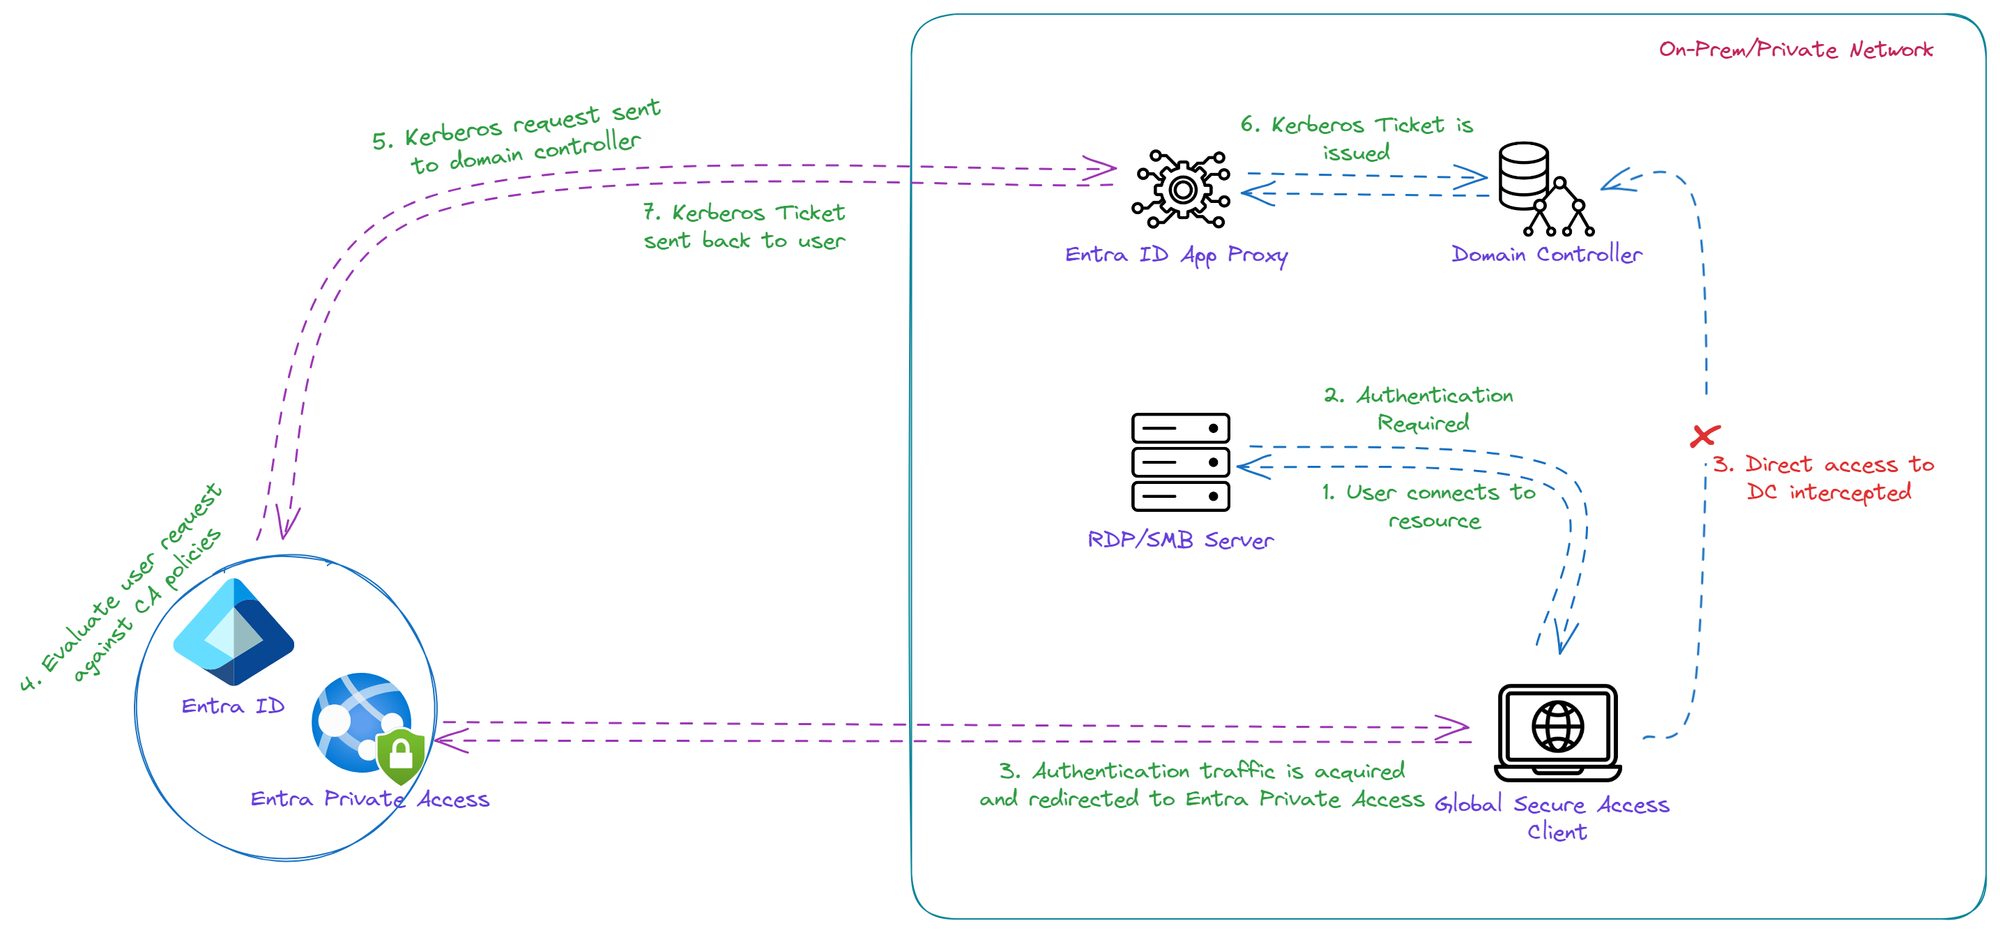
User attempts to access an internal resource from a Global Secure Access client installed machine on on-prem/private network.
- When authentication is required by internal resource, direct communication to Domain Controllers will be intercepted by GSA client and redirects the authentication traffic to Entra Private Access
- Entra Private Access evaluates the user's request against Condition Access policies
- Once CA policies are satisifed, Kerberos request will be sent to Domain Controllers via App Proxy Connector
- Once user provided domain credentials are accepted, Kerberos ticket will be issued
- Kerberos ticket will be sent back to user via App Proxy Connector and Entra Private Access