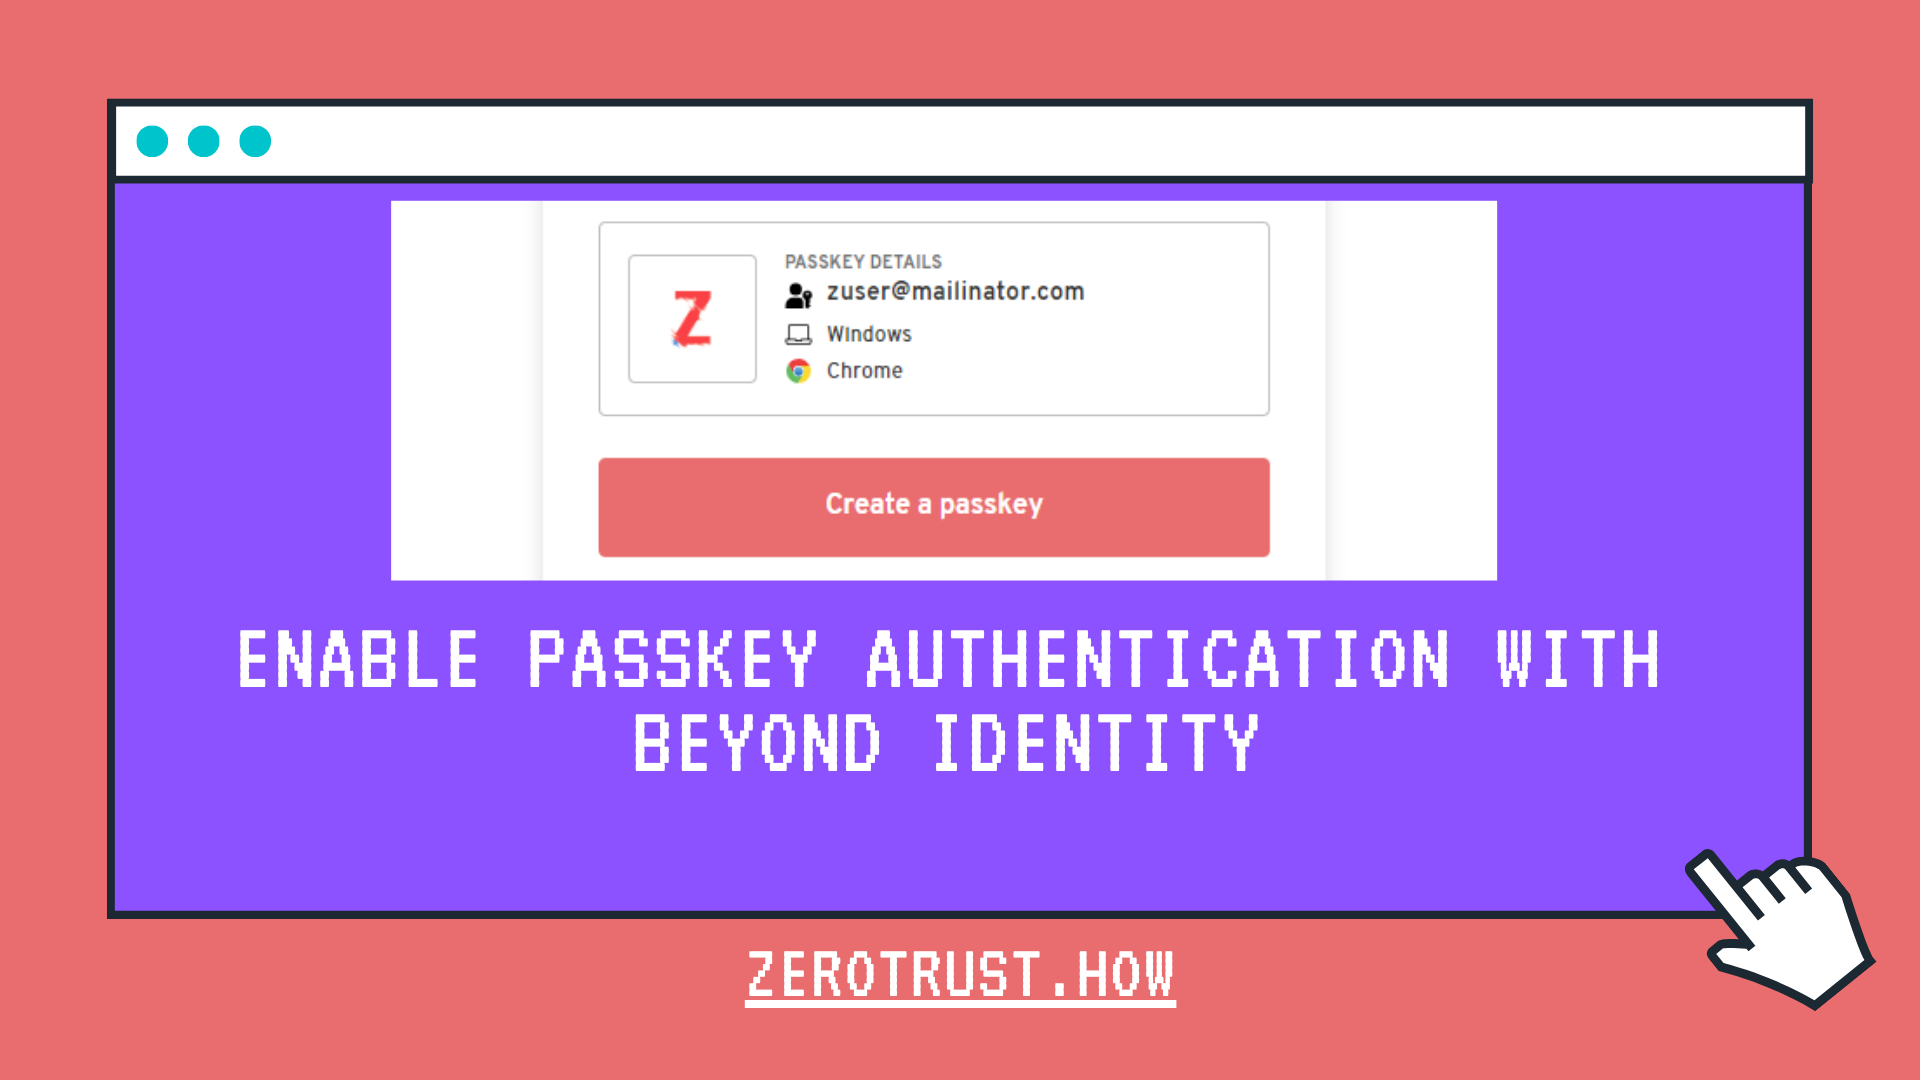
Beyond Identity Universal Passkeys: Hosted Web Authentication
Enable passkey authentication in your web application using Beyond Identity's Universal Passkeys

In this tutorial, will demonstrate how to integrate Beyond Identity Universal Passkeys into your web application (Next.js) for Authentication.
What are Passkeys?
Passkeys are a safer and easier alternative to passwords. With passkeys, users can sign into apps and websites with a biometric sensor (such as a fingerprint or facial recognition), PIN, or pattern.
Beyond Identity's Universal Passkey
A Universal Passkey is a public and private key pair. The private key is generated and stored and never leaves the user’s device. The public key is sent to the Beyond Identity Cloud. All keys get linked to the user and their devices cryptographically.
Passkeys are stored in Trusted Execution Environments (TEE) wherever they're available. For example, In Apple Devices, keys are stored in Apple T2 chips. In Windows and Linux devices, keys are stored on Trusted Platform Modules (TPM). If no TEE is available, Beyond Identity SDKs automatically fall back to OS-specific security APIs for safe storage on the hard disk.
Beyond Identity offers 2 types of authenticator configuration options which users can experience while authentication.
- Hosted Web - In this model, Beyond Identity's hosted web app handles passkey registration and authentication
- Embedded SDK - In this model, you have more control over user's authentication experience, but your app must do the work of registering and enumerating passkeys for the user
Demo
Prerequisites
- Visual Studio Code or any IDE that supports Next.js development
- Node.js
- Beyond Identity Secure Customers
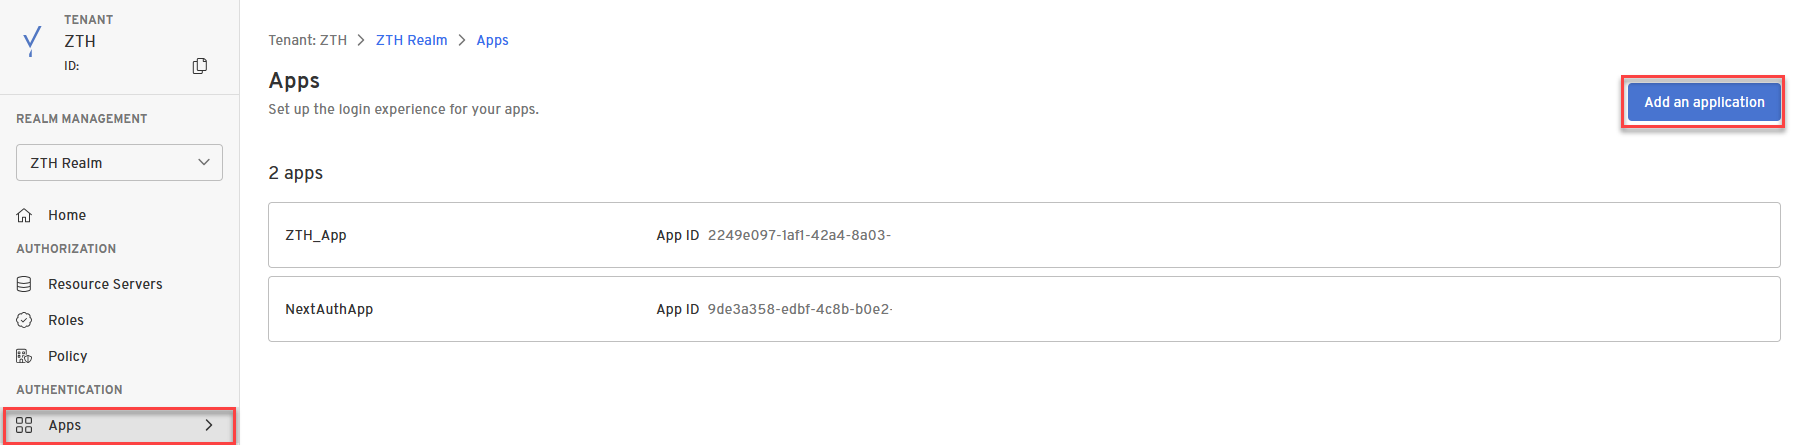
Create an App in Beyond Identity Console
Log in to Beyond Identity Console, select Realm. Under Authentication, select Apps, then click on Add an application button.
In External Protocol tab of Add a new application form, Enter the App Display Name. Select remaining fields as follows:
- Protocol: OIDC
- Client Type: Confidential
- PKCE: Disabled
- Redirect URIs: http://localhost:3000/api/auth/callback/beyondidentity (expected value by NextAuth.js in identity provider configuration)
- Token Endpoint Auth Method: Client Secret Basic
- Grant Type: Authorization Code
- Token Format: Self-Contained
- Subject: id
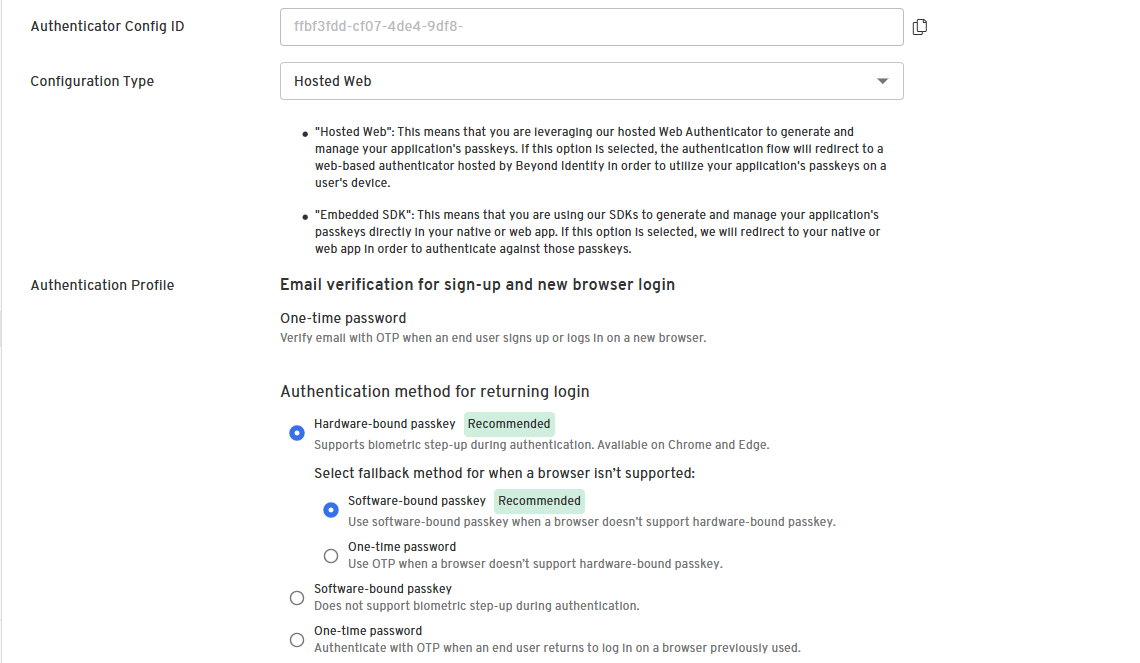
In Authenticator Config tab, Select Configuration Type as Hosted Web and leave rest of the options default.
Then click on Submit.
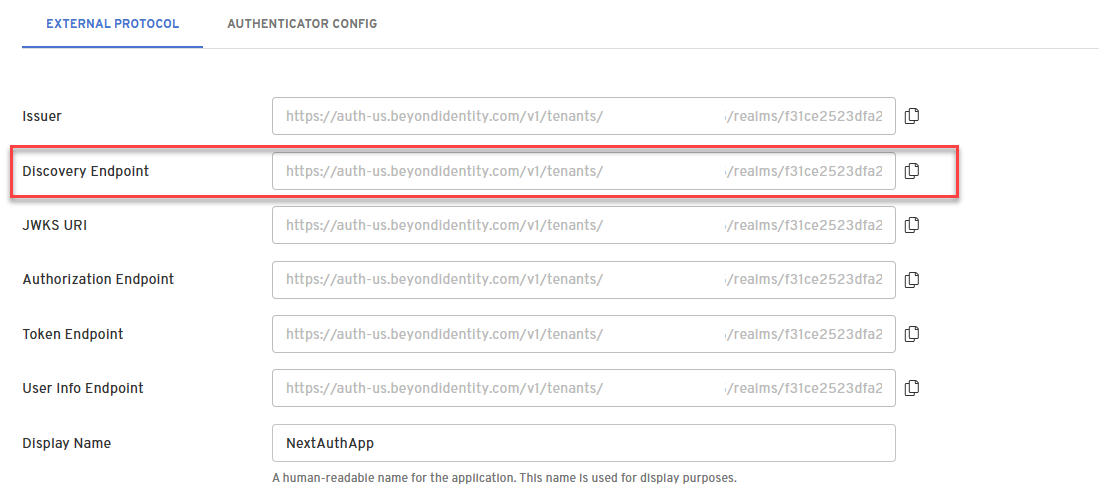
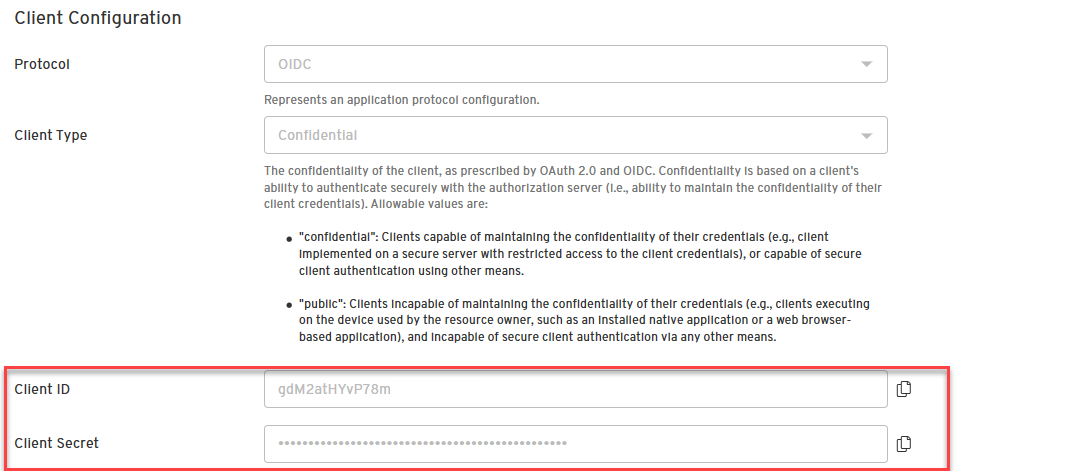
Make a note of following information from Beyond Identity to configure in Next.js web application:
- Discovery Endpoint
- Client ID
- Client Secret
Create and Configure Next.js Web App for Authentication
Open terminal and navigate to the location in which to create a new project. Enter the following commands to make a Next.js project and install the relevant packages.
npx create-next-app@latestEnter project name and select TypeScript as Yes. Select rest of the options as desired. Enter the following commands to install NextAuth.js module.
cd <project folder>
npm i next-auth
Open the project in VS Code, create .env file in the project root folder and copy below code, replace the values with your application values.
# Next Auth
NEXTAUTH_URL=http://localhost:3000
NEXTAUTH_SECRET=<random secret>

# Beyond Identity
BEYOND_IDENTITY_CLIENT_ID=<beyond identity client id>
BEYOND_IDENTITY_CLIENT_SECRET=<beyond identity client secret>
BEYOND_IDENTITY_DISCOVERY=<beyond identity discovery endpoint>
Create route.tsx file with following code in the app\api\auth\[...nextauth] folder (create these folders if mentioned folder structure doesn't exist)
import NextAuth from "next-auth/next";
import type { NextAuthOptions } from "next-auth"

export const authOptions: NextAuthOptions = {
  providers: [
    {
      id: "beyondidentity",
      name: "Beyond Identity",
      type: "oauth",
      wellKnown: process.env.BEYOND_IDENTITY_DISCOVERY,
      authorization: { params: { scope: "openid" } },
      clientId: process.env.BEYOND_IDENTITY_CLIENT_ID,
      clientSecret: process.env.BEYOND_IDENTITY_CLIENT_SECRET,
      idToken: true,
      checks: ["state"],
      profile(profile) {
        return {
          id: profile.sub,
          name: profile.name,
          email: profile.email,
        }
      },
    },
  ],
}

const handler = NextAuth(authOptions)

export { handler as GET, handler as POST }
Create a new component userAuth.tsxto initiate Sign-In and Sign-Out actions.
"use client"
import { signIn, signOut, useSession } from 'next-auth/react';

export default function UserAuth() {
    const { data: session, status } = useSession();
    if (status === "authenticated") {
        return (
            <div>
                <button type="button" className="btn btn-warning" onClick={() => signOut()}>Sign Out</button>
            </div>
        )
    }
    return <button type="button" className="btn btn-primary" onClick={() => signIn('beyondidentity')}>Sign In</button>
}
Check the GitHub for other supporting files such as Layout, Page, Providers and UserInfo components.
Save all the code and return back to the terminal. Run the below command to launch the web application.
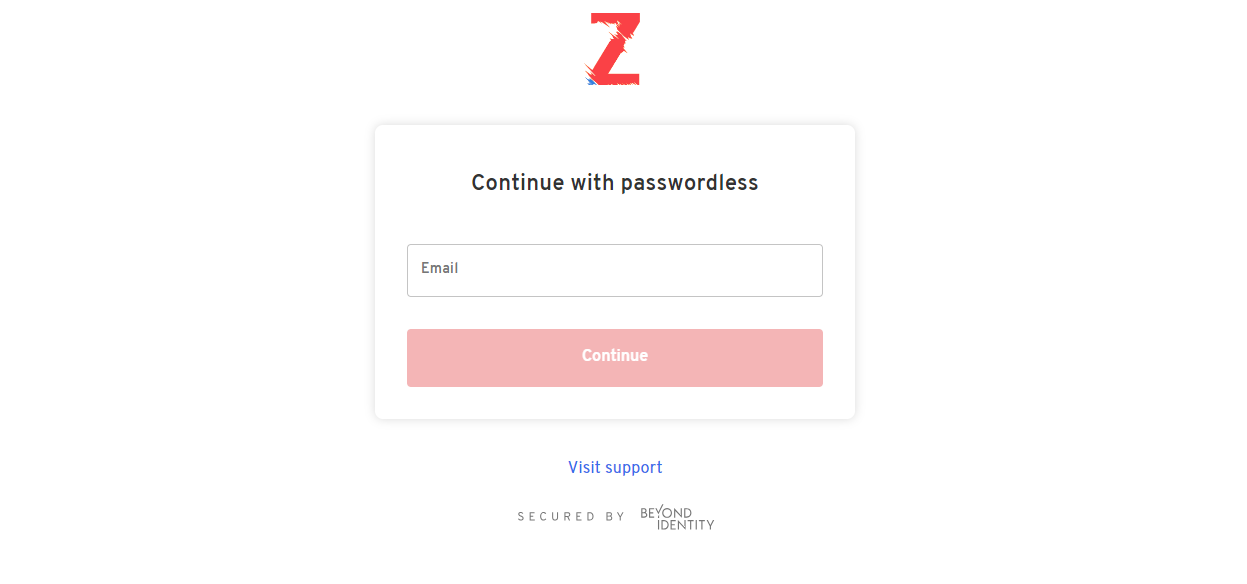
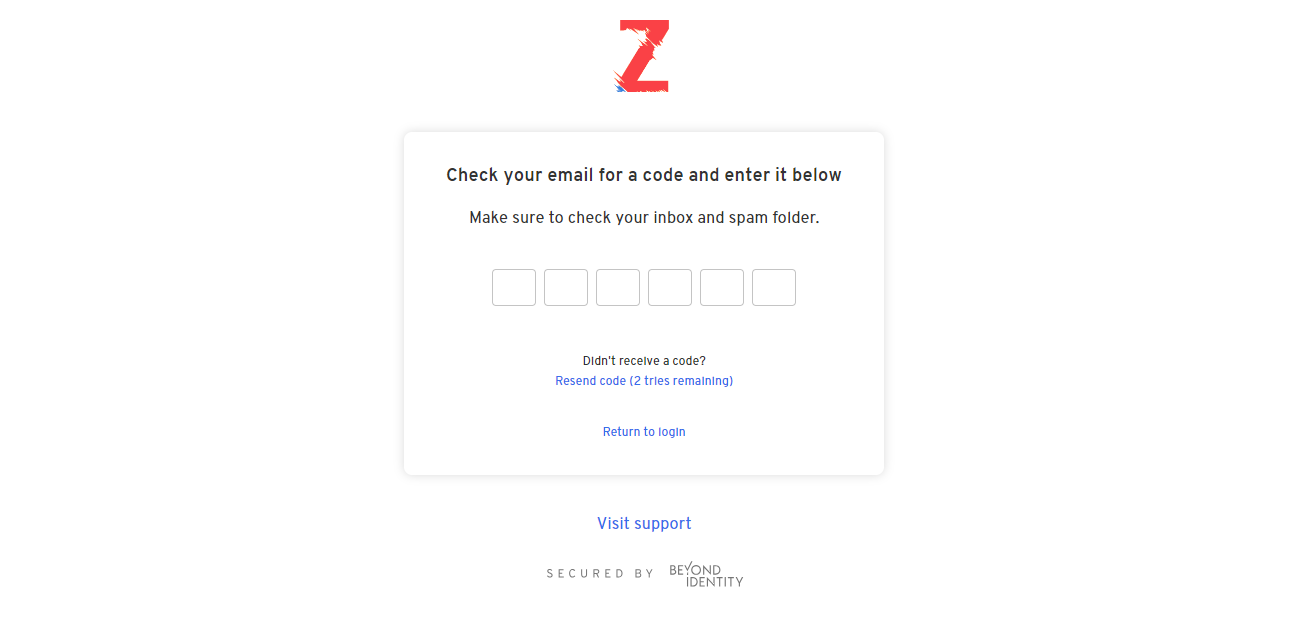
npm run devOpen a new private browser, and enter the application URL into the browser, in this case https://localhost:3000. Once successfully authenticated on Beyond Identity Passkeys, browser will be redirected to home page with returned user identity claims.
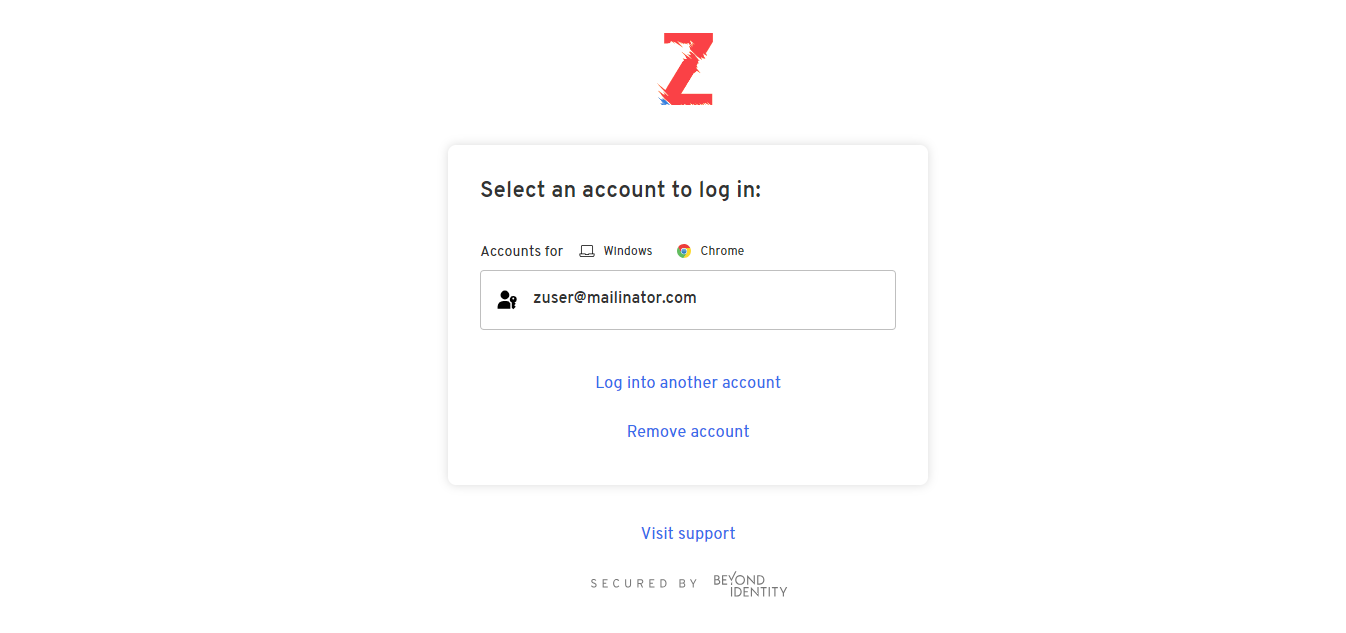
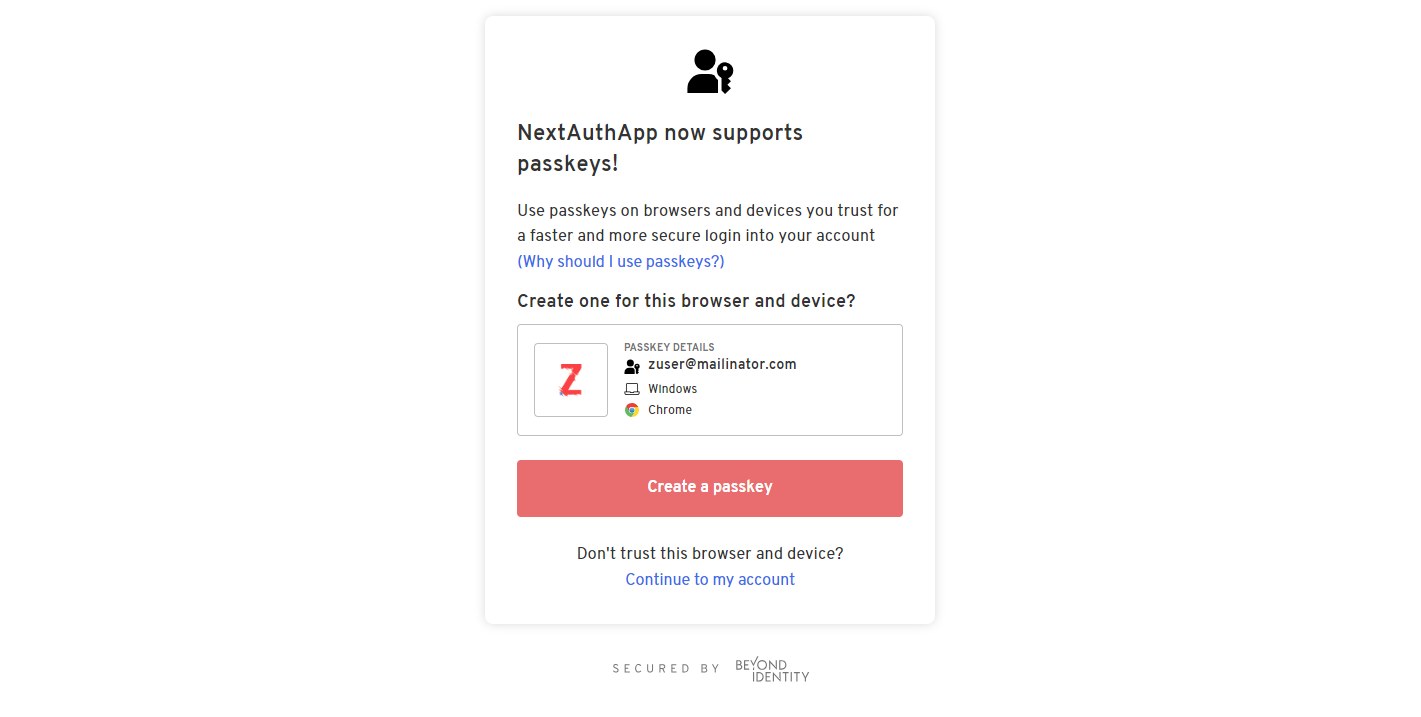
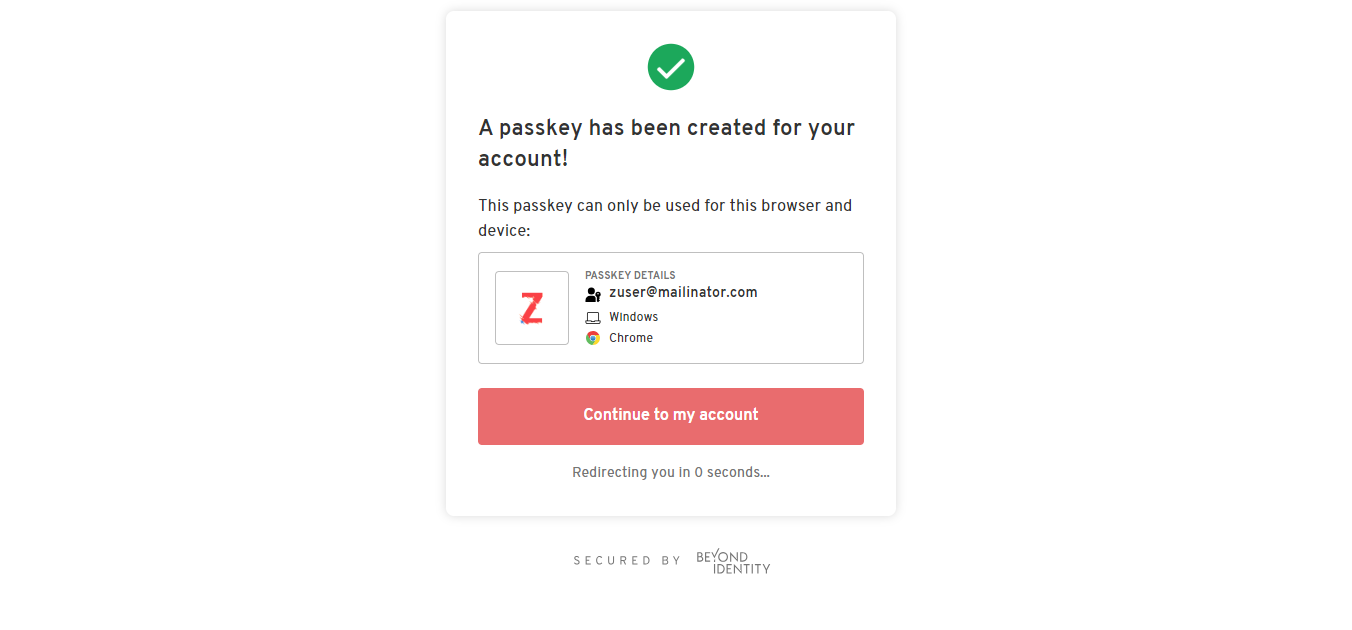
User's First Time Login Experience
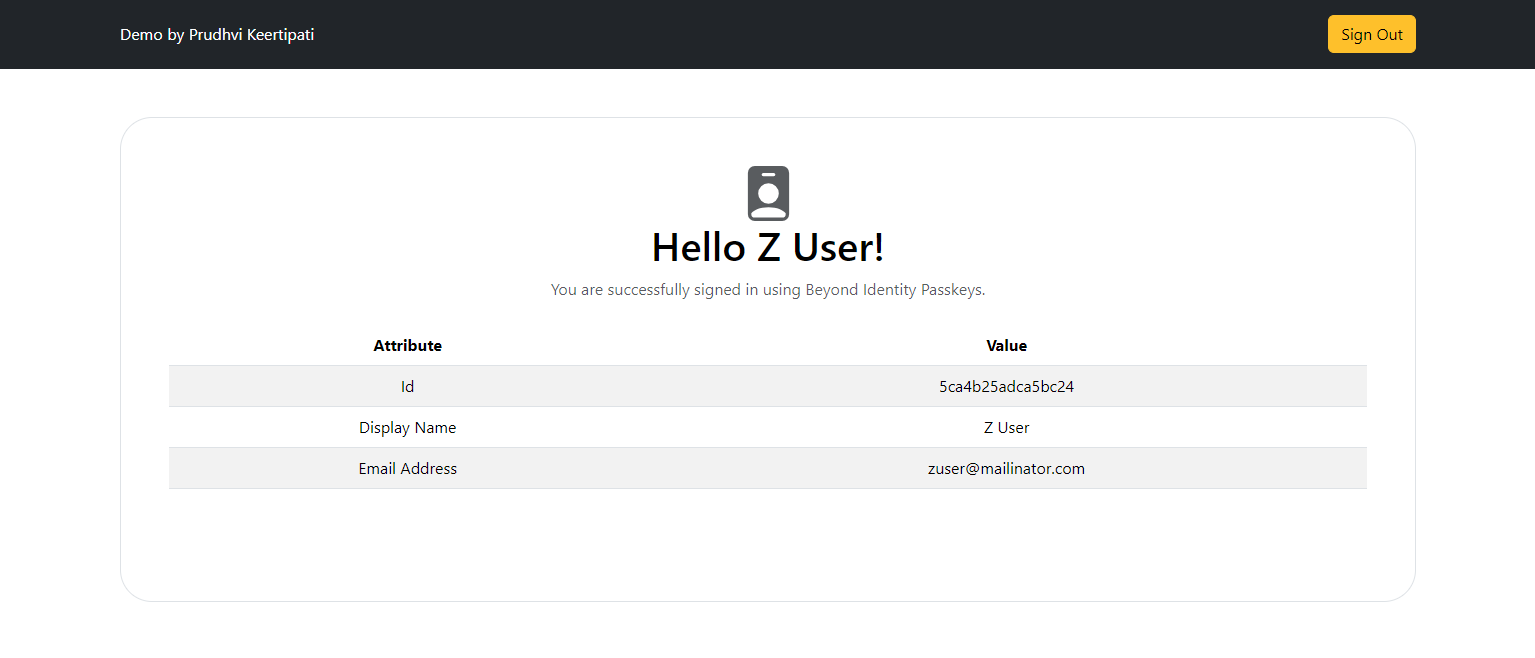
User's Subsequent Login Experience